Skip to content
 If you’ve ever had a peaceful evening ruined by a swarm of mosquitoes, you know that an open outdoor space has its limits. Learning how to screen in a porch is one of the most effective ways to reclaim your home’s exterior, turning a seasonal deck into a year-round sanctuary.
A porch with screen enclosures provides the ideal combination of nature and comfort, whether you’re aiming to create a bug-free dining area or a secure space for pets to relax. In this guide, we’ll walk through the essential materials, 2026 updated pricing, and the step-by-step process to help you set a screen like a professional. Let’s take a closer look at what you need to know and how to get the best local help to screen a porch in your area.
What Is a Screened Porch?

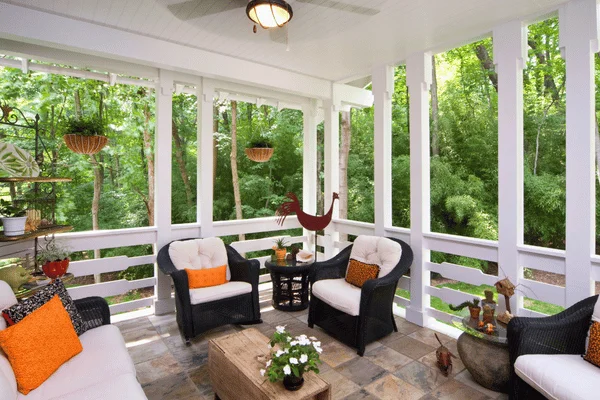
At its core, a screened-in porch means to install a mesh barrier, usually fiberglass or aluminum, into a structural frame to enclose an existing patio or deck. Unlike a sunroom, which uses glass to create a fully climate-controlled environment, a screened-in porch maintains high airflow.
You generally have two options for the design:
- Full Enclosure: Screening from the floor to the ceiling.
- Partial Screening: Utilizing a knee wall (a short, solid wall) at the bottom with screens filling the top portion.
Top Benefits of a Porch with a Screen
Beyond the obvious advantage of avoiding itchy welts, a porch with screen protection changes how you interact with your home.
Keep Insects and Debris Out
The primary driver for most homeowners is pest control. Beyond mosquitoes, screens keep out flies, wasps, and even larger critters like squirrels or birds. It also acts as a filter for falling leaves and wind-blown grass clippings, keeping your outdoor furniture much cleaner.
Enjoy Fresh Air Without Compromise
An open porch often feels vulnerable to the elements. With a screen, you can enjoy a rainstorm without getting soaked by the mist or sit outside during the height of pollen season with a significant reduction in allergens blowing directly onto your seating area.
Enhance Home Value and Curb Appeal
In the 2026 real estate market, outdoor living is a top-tier selling point. A well-executed screened porch adds functional square footage to your listing. It signals to buyers that the home has been upgraded for lifestyle and comfort.
Create a Functional Outdoor Living Area
With the bugs gone, the porch design and installation becomes a true extension of the house. You can safely keep electronics like outdoor TVs or high-end speakers on the porch, as the screens provide a secondary layer of protection from the wind and light moisture.
Materials Needed to Screen In a Porch

Choosing the right mesh and frame determines how long your project will last before it begins to sag or tear.
Types of Screening Materials
- Fiberglass Screens: The most popular choice for DIYers. It is budget-friendly, easy to stretch, and won’t crease like metal.
- Aluminum Screens: Harder to install, but much more durable. It resists UV damage better than fiberglass and is less likely to tear if a stray branch hits it.
- Pet-Resistant Screens: A heavy-duty vinyl-coated polyester. It is up to seven times stronger than standard mesh—perfect if you have cats that like to climb or dogs that paw at the door.
Frame Options
- Wood Framing: Provides a classic, rustic aesthetic. Pressure-treated lumber or cedar is the standard here.
- Aluminum or Vinyl Systems: Modern Screen Tight or Screeneze systems use tracks that snap into place, hiding the staples and making future screen replacements much easier.
Essential Tools and Accessories
When learning how to screen in a porch effectively, you will need the following:
- Spline and Spline Roller: The rubber cord that locks the screen into a groove.
- Staple Gun: Used if you are going the traditional wood-trim route.
- Utility Knife: For trimming excess mesh flush against the frame.
- Measuring Tape and Level: Accuracy here prevents waves in the screen.
Step-by-Step Guide: How to Screen In a Porch
Follow this workflow to ensure a professional-grade finish.
Step 1 – Measure and Plan Your Layout
Measure each opening between your porch posts. If your spans are wider than 8 feet, you should add vertical mullions (support studs) to prevent the screen from sagging over time.
Step 2 – Prepare the Porch Frame
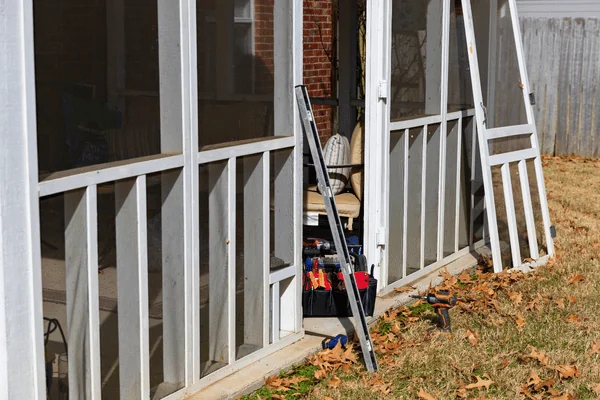
Ensure your wood is dry and painted or stained before you apply the screen. If you are using a track system, screw the base tracks into your posts and headers now.
Step 3 – Cut and Fit the Screen Panels
Unroll your mesh on a clean surface. Cut each piece about 2 inches wider and longer than the opening. This overage gives you something to grip while you are tensioning the material.
Step 4 – Secure the Screen (Spline or Staple Method)
If using a track system, roll the spline into the groove, starting at the top, then the sides, and finally the bottom. Pull the screen taut, but not so tight that it bows the frame. If stapling, start in the center of the top rail and work your way out to the corners.
Step 5 – Trim Excess and Finish Edges
Using a sharp utility knife, cut the excess screen material away. If you stapled the screen, cover the edges with wood lattice or stop molding to hide the staples and protect the mesh edges from the sun.
Cost to Screen In a Porch (2026 Guide)
Pricing has shifted recently because of material costs. Here is what to expect for a standard 20×20 space.
| Feature | DIY Estimated Cost | Professional Estimated Cost |
| Materials | $600 – $1,200 | Included in Labor |
| Labor | $0 | $1,500 – $3,000 |
| Per Square Foot | $2 – $5 per sq. ft. | $10 – $25 per sq. ft. |
| Total (Standard Porch) | $600 – $1,200 | $2,100 – $4,200+ |
Factors That Affect Cost
- Porch Size: While a standard 200-square-foot porch fits the averages above, larger wraparound decks will scale in price accordingly.
- Material Quality: Premium pet-resistant or solar-blocking mesh can increase your material costs by 20% to 30%.
- Structural Needs: If your porch requires new support posts or a screen door installation, expect to add $300 to $600 to your total budget.
DIY vs. Hiring a Professional
Deciding whether to start a DIY project or call an expert depends on your comfort with carpentry and your project’s complexity.
When DIY Makes Sense
If your porch has a simple rectangular layout and the structural posts are already in good condition, this is an excellent weekend project. It is highly cost-effective, as you only pay for materials and basic tools. If you are comfortable using a level, a staple gun, and a utility knife, you can achieve professional-looking results.
When to Hire a Pro
A professional is the right choice for high-ceiling gables, custom structural additions, or integrated electrical work like ceiling fans. If you want a seamless finish with heavy-duty track systems or high-end screen doors, a contractor ensures the job is done to code and backed by a warranty.
Common Mistakes to Avoid When You Screen In a Porch
While DIY projects are rewarding, small errors in tension or sealing can quickly lead to structural issues. Professionals bring the precision and heavy-duty tools needed to avoid common pitfalls that compromise the lifespan of your enclosure. Here are the most frequent mistakes to watch for during installation:
- Incorrect Measurements: Even a 1/4-inch gap is enough for mosquitoes to enter.
- Low-Quality Spline: A cheap spline can dry out and crack, causing the screen to fall out.
- Ignoring Weather Exposure: If you live in a high-wind area, use a heavy-duty track system rather than just staples.
Pro Tips for a Durable and Stylish Screened Porch

- UV-Resistant Materials: In high-altitude areas, the sun will eat through a cheap mesh in two years. Invest in UV-rated vinyl-coated screens.
- Add a Screen Door: Don’t forget to plan for an entry/exit point to your backyard!
- Install Ceiling Fans: Screens reduce wind slightly; a fan keeps the air moving and helps blow away any small gnats that manage to get through the mesh.
FAQs
1. How much does it cost to get a screened porch?
On average, a homeowner will spend between $1,200 and $3,500 for a professionally installed screen enclosure. For a DIY project, you can expect to spend $400 to $900 on materials and tools, depending on the size of the space.
2. Can I screen in my porch myself?
Yes, screening on a porch is a highly accessible DIY project. If the structural posts are already in place, the process mainly involves attaching a frame system or stapling mesh and covering it with trim.
3. What is the best material for a porch with a screen?
For most homes, fiberglass mesh is the best balance of cost and visibility. However, if you have pets or live in a region with heavy debris, tuff-screen or aluminum mesh is a better long-term investment.
4. How long does it take to complete the project?
A standard-sized porch (approx. 150 sq. ft.) can usually be screened in by two people over the course of a single weekend, assuming the structural frame is already in good condition.
5. How can I keep my screened porch warm in the winter?
To extend the use of your porch into the colder months, you can install removable clear vinyl panels or heavy-duty outdoor curtains. These barriers block the wind and trap heat from a portable space heater, allowing you to enjoy the space even when temperatures drop.
Final Thoughts: Ready to Screen In Your Porch?
Learning how to screen on a porch is an investment that pays off every time you sit outside on a summer evening without a can of bug spray. By choosing the right materials and taking the time to tension the screens properly, you create a beautiful, durable space that enhances your home’s value and your quality of life.
Whether you decide to tackle this task as a weekend DIY project or bring in a contractor for a high-end finish, a porch with screen protection is a choice you won’t regret.Contact All Pro Cherry Hill Deck Builders today to explore premium screening materials or get a professional quote!